Oh kombucha, how I love thee.
Your bubbles, your kinda-sweet, kinda vinegar-y taste, your endless flavours, and your gut-friendliness. I could drink you all day long. Your only fault?
Your price in grocery stores. $4 a bottle? Really? That’s a little crazy – almost like Starbucks crazy. A girl’s gotta eat, and a kombucha-drinking habit can be a difficult and pocket-emptying one to keep. But I’ve figured out a secret…
It’s ridiculously easy to just make your own!
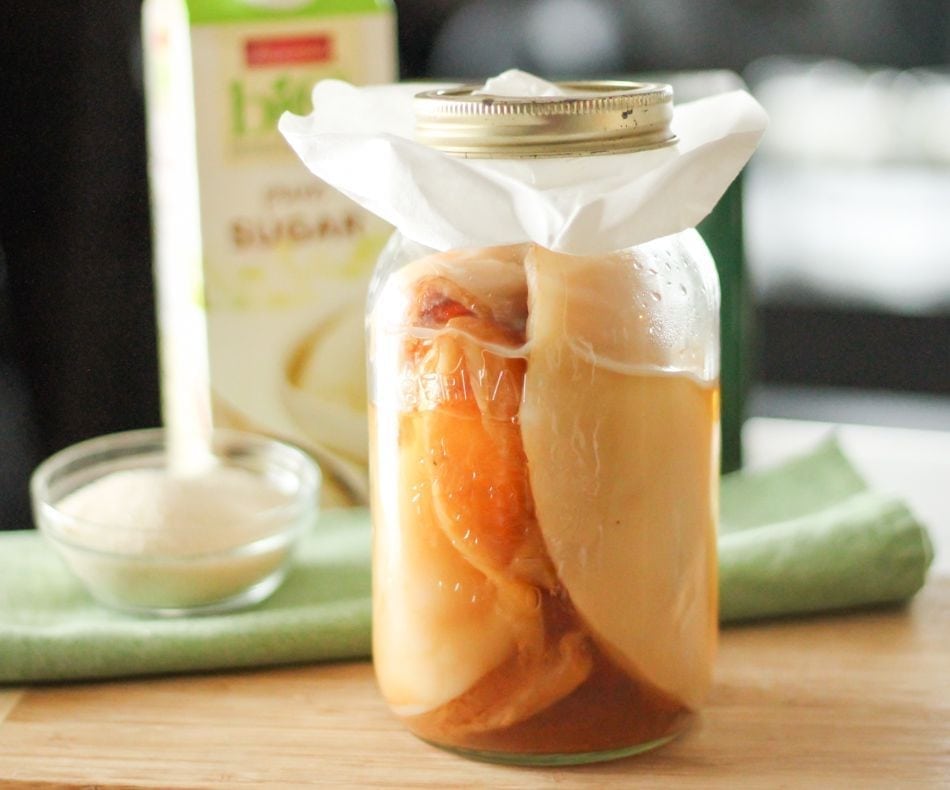
At the beginning of this year, my bestie Jess and I decided we would do some kitchen experiments, fermentation being the first. With both of us being kombucha addicts, this lovely little bevvy seemed like a great place to start. To do so however, we needed a scoby – also known more scientifically as a symbiotic culture of bacteria and yeast. It’s an ugly bugger, but a required ingredient for brewing up endless bottles of delicious kombucha.

So where does one procure a scoby? I found one in a kit at a local health food store, but when I brought it home and saw the look on Jess’s face after telling her how much I paid for it ($40) she was appalled.
Apparently these things can be found on Kijiji for next to nothing, so I promptly returned the kit (which didn’t contain much other than the scoby, sugar and a bit of tea) and we hopped online to find a seller. Lucky for us, we found a guy who was willing to give us a HUGE scoby for $10. We cut it up into 4 pieces, bought some big mason jars, and off to the races we went.
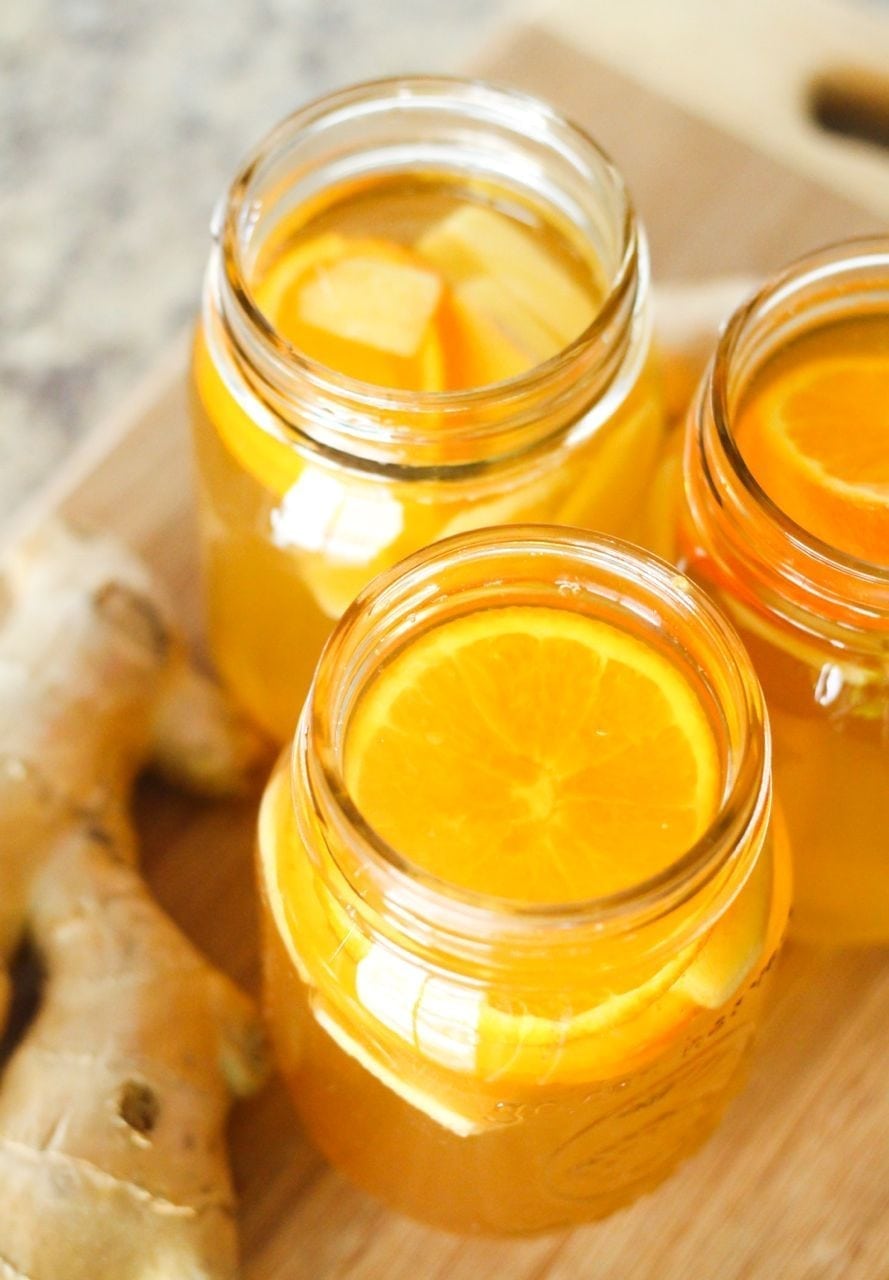
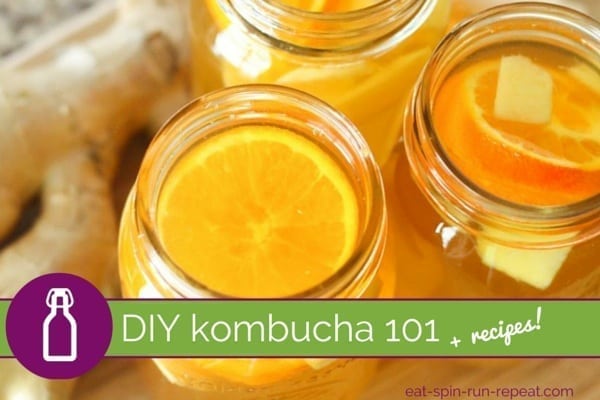
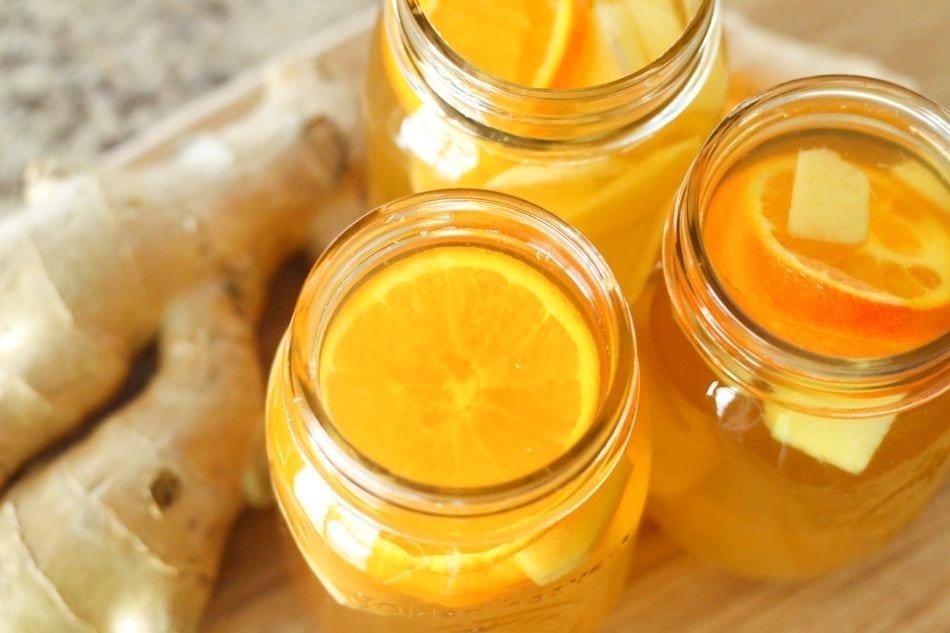
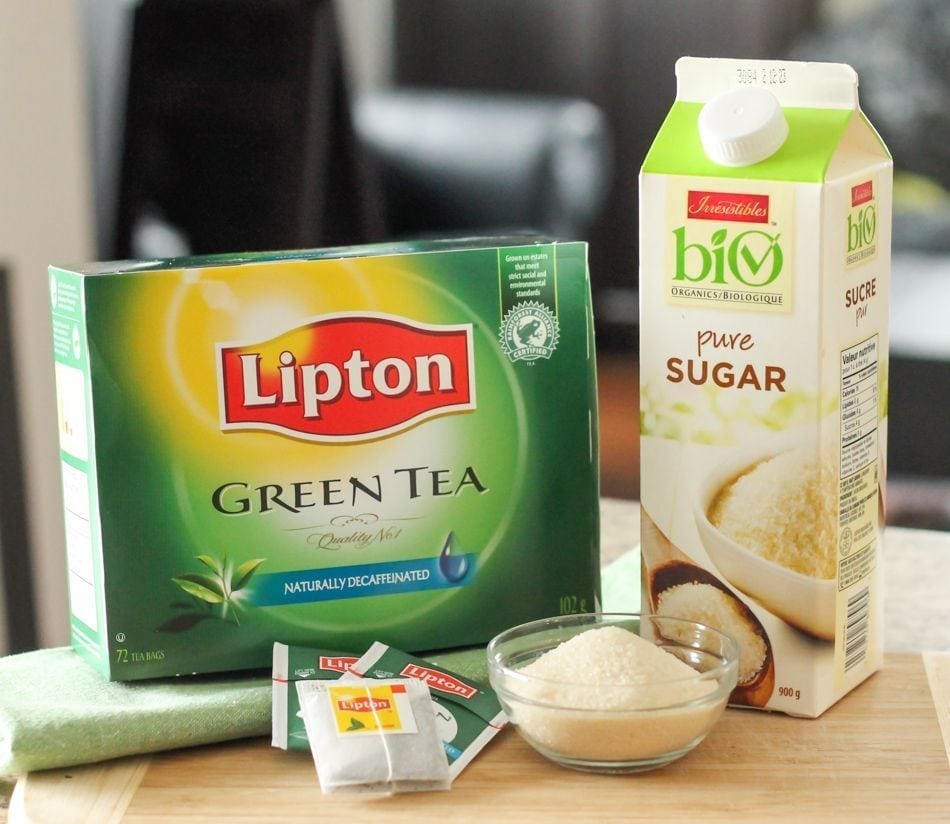
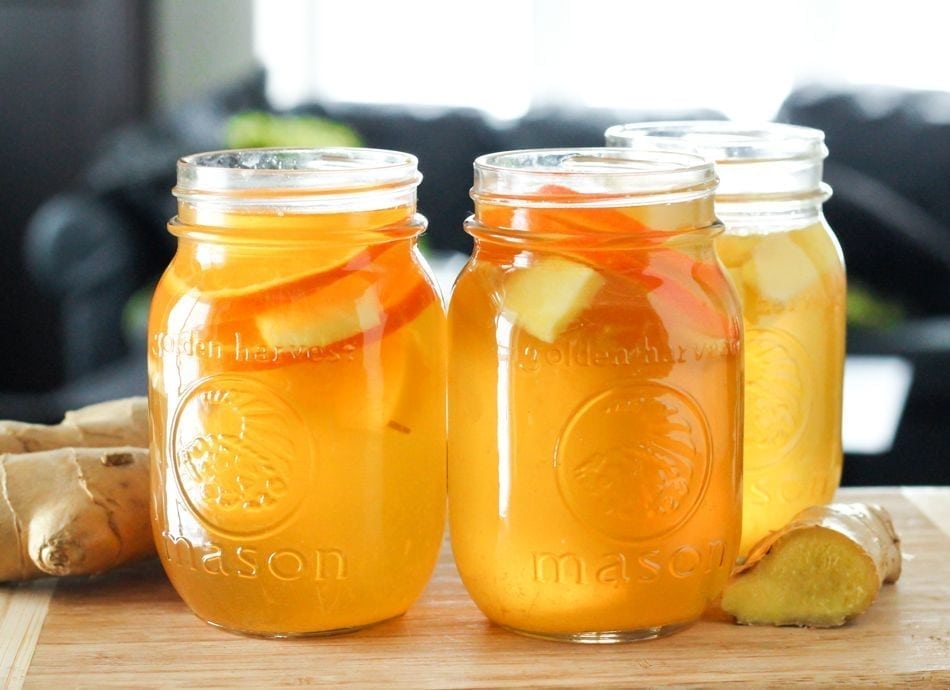
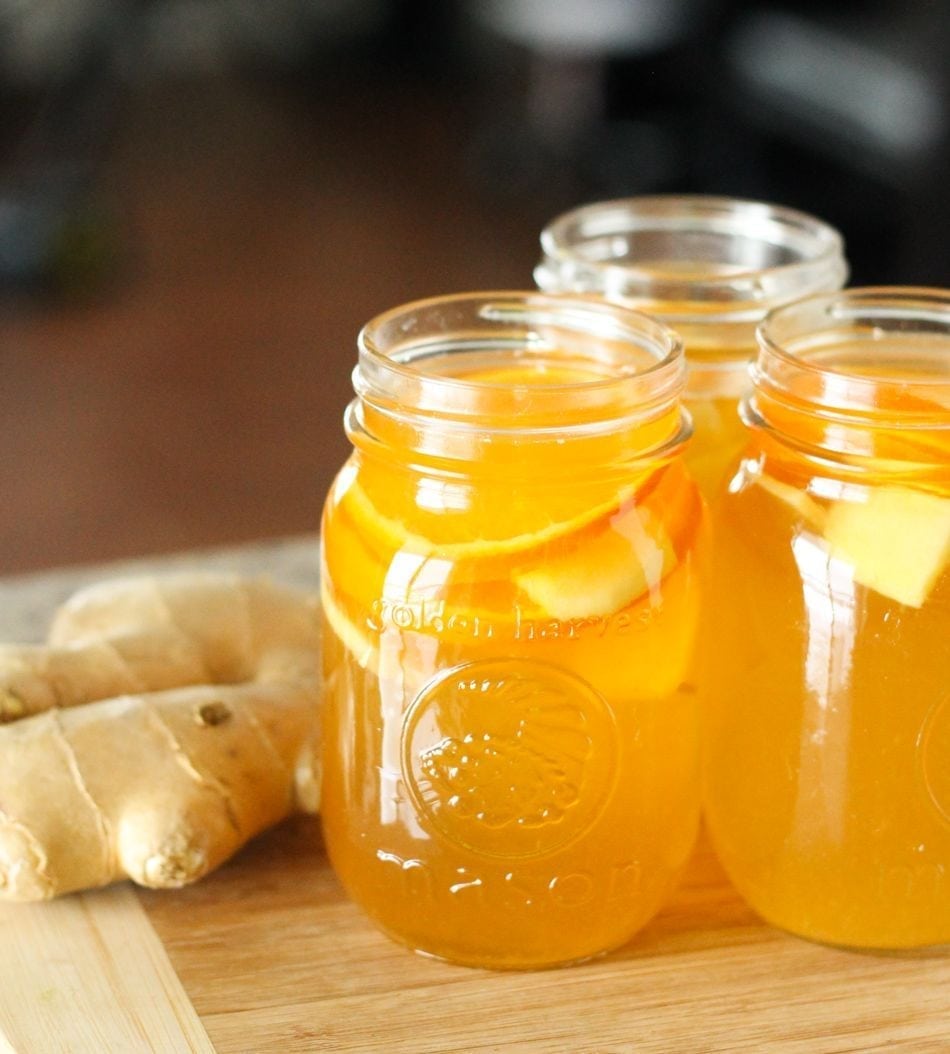
The only other ingredients needed are white vinegar, green tea (we used decaf so we can drink kombucha ALL.DAY.LONG), cane sugar and whatever you want to use as a flavouring. There are so many combinations so you can get really creative, but our all-time favourite so far is a ginger-orange creation that we’ve made every single weekend for the past month. More about that in a second – you need the basic recipe first!
DIY Kombucha
Prep Time: 30 mins (not all active)
Cook Time: 5 mins
Ingredients (about 8 cups)
- kombucha scoby/starter
- 6 cups of water
- glass jars large enough to hold about 8 cups of kombucha – 2 large mason jars should be fine
- 4 green tea bags
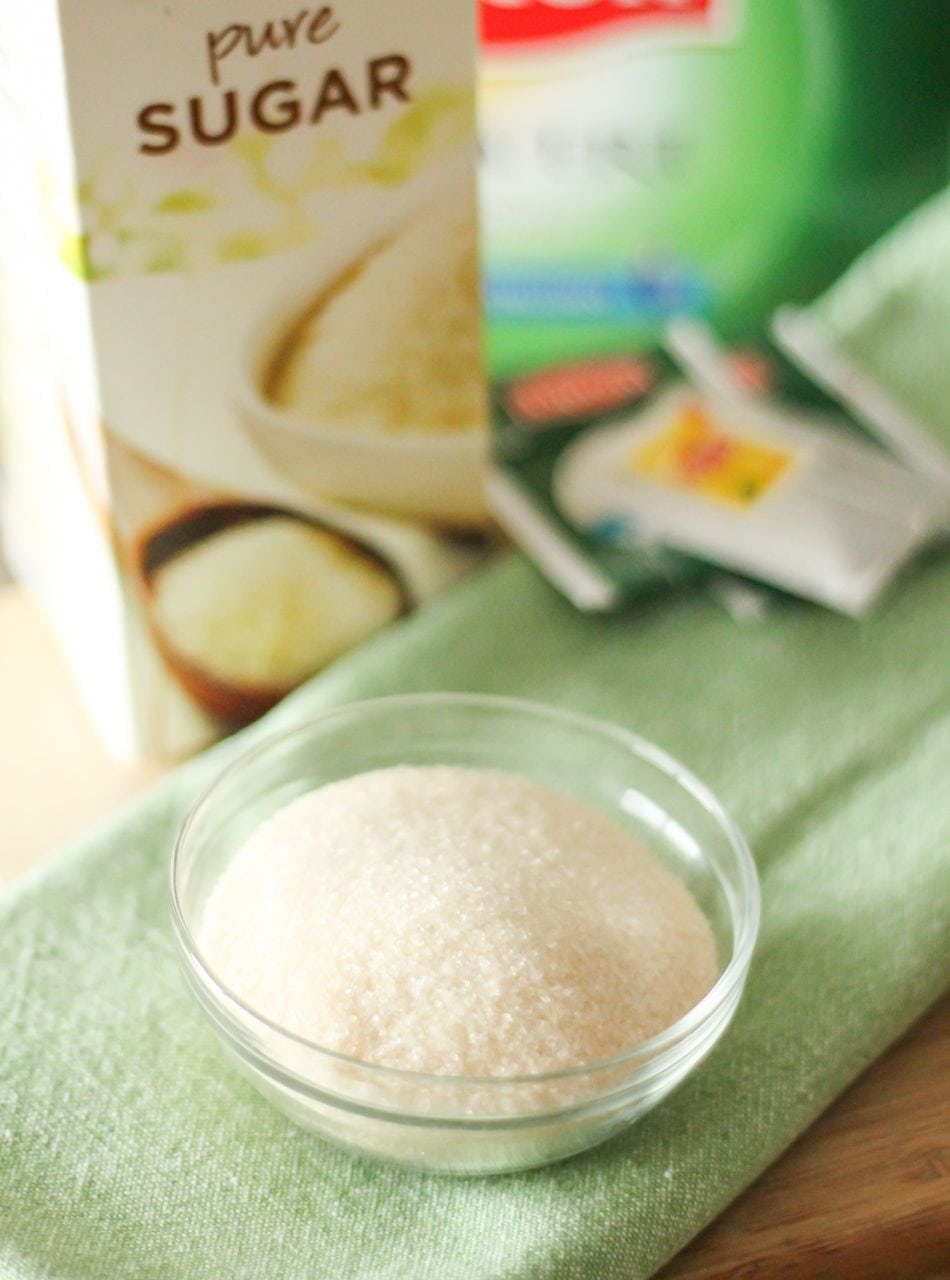
- 1/4 cup sugar per jar (don’t substitute this for alternative sweeteners – the purpose of the sugar is to feed the scoby – if you leave it out, it will die)
- 1/2 cup white vinegar per jar
Instructions
Bring the water to a boil in a large pot on the stove. (Note: I haven’t used boiling water from my kettle in case calcium pieces happen to get transferred to the kombucha. Aim to make your water as pure as possible for best results.)
Pour the water into the jars along with the sugar. Stir until the sugar is dissolved, then add the tea bags.
Let the tea steep and cool until the jars feel warm (not hot) or lukewarm to the touch.
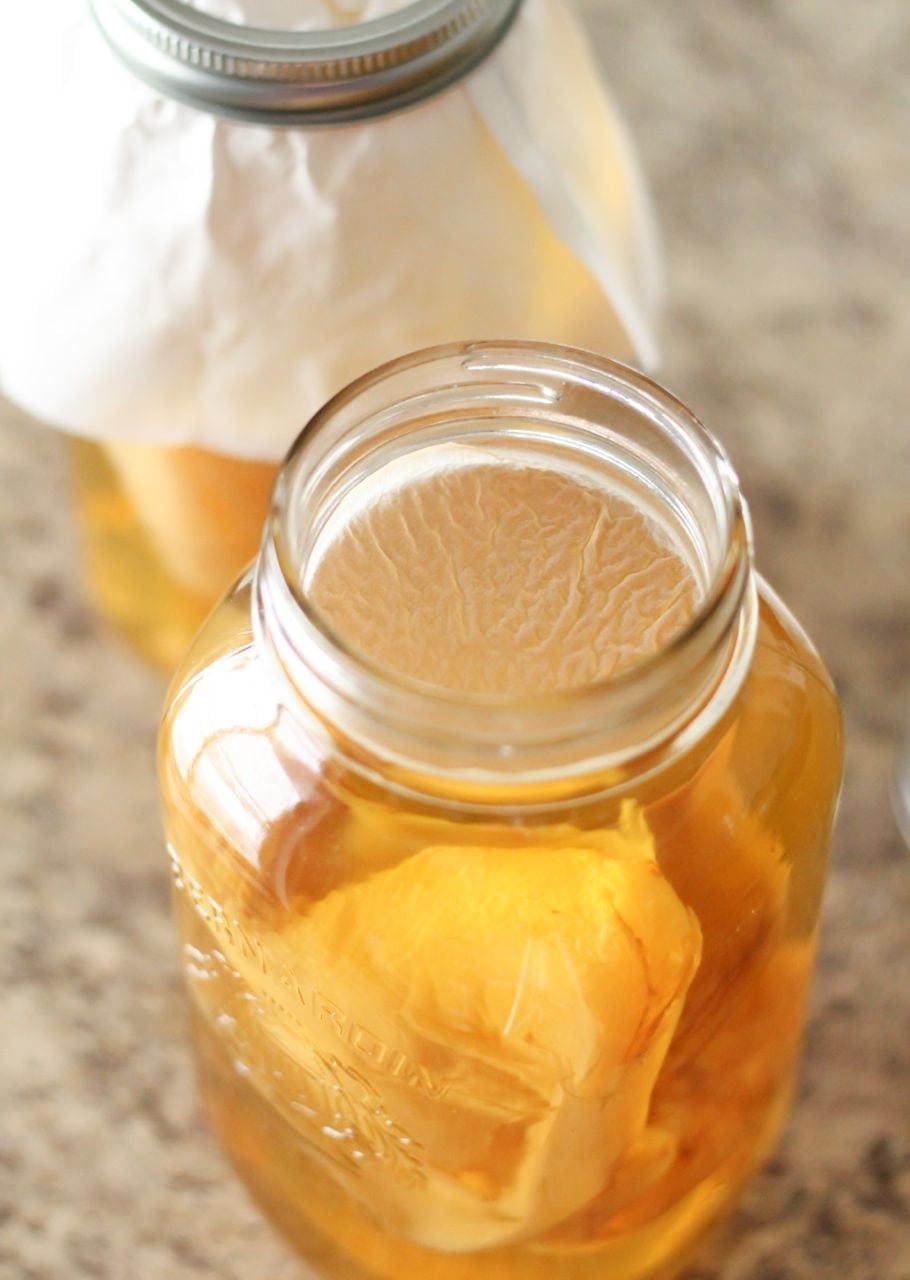
Pour in the scoby/active starter and the vinegar. Cover the top of the jar with a coffee filter and put a rubber band around it to keep it in place.
Store the jars in a dark, dry place (like the inside of a cupboard) for between 1 and 4 weeks. The longer you leave it to ferment, the less sweet it will taste. (We typically just leave ours for 1 week.)
When ready, take the coffee filter ‘lid’ off the top of the jars. A new kombucha starter will have formed on the top, and you can use this for future batches (so don’t throw it away!)
Take the scoby/active starter out of each jar and put them in a bowl to be used immediately again in your next batch.
Use a fine mesh strainer to pour the kombucha into clean jars, leaving any stringy bits of the starter behind.
Flavour and sweeten as you like with fruit, spices, fresh herbs, etc.
Store the kombucha sealed in the fridge for 7-10 days.
Click here to print the recipe.
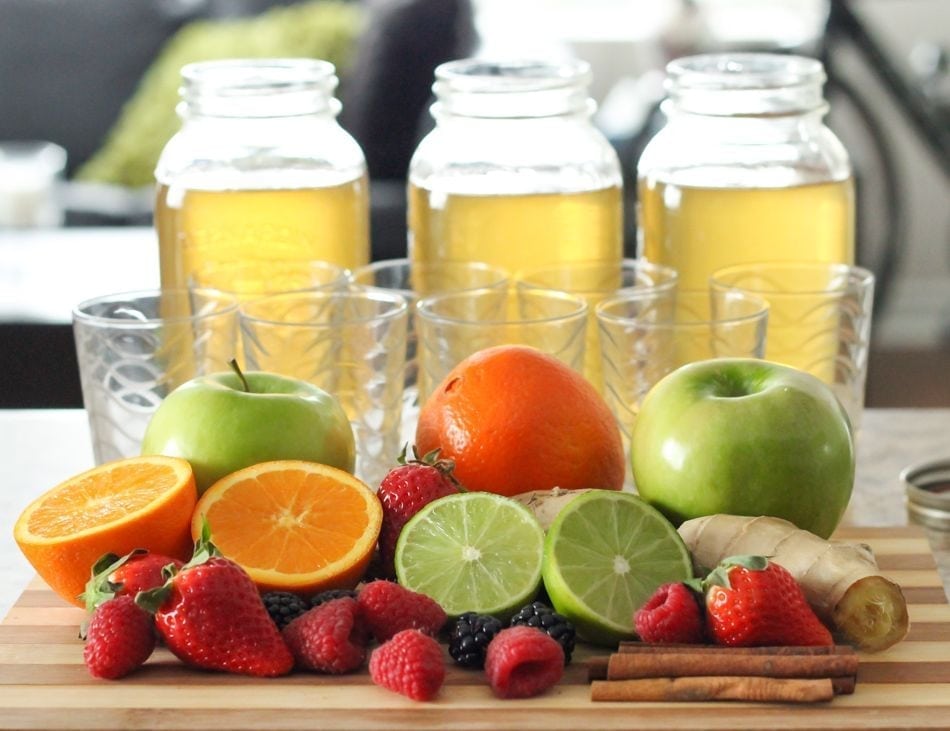
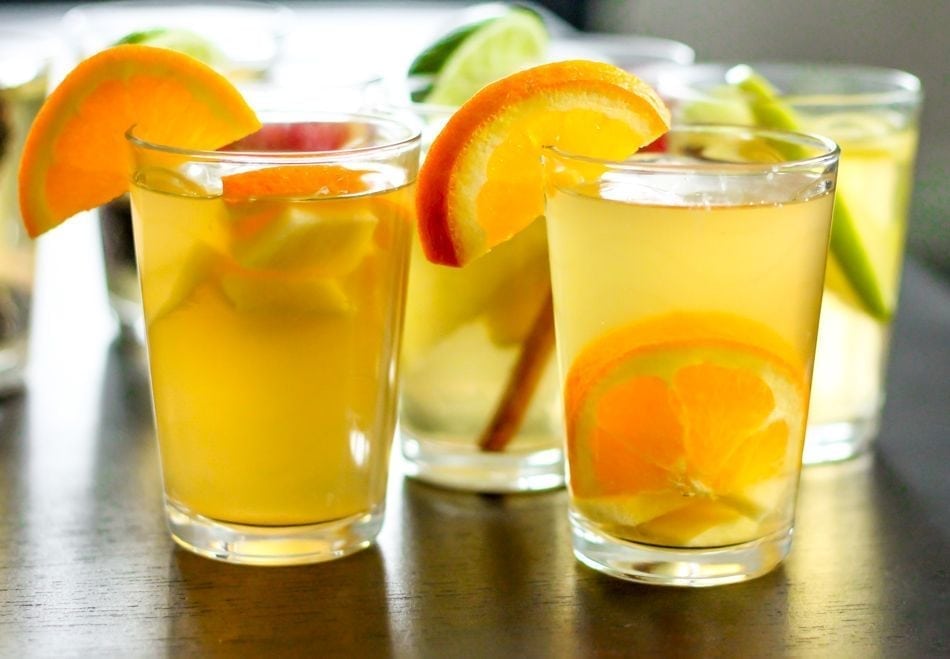
As far as the flavourings go, these are some of the ones I’ve made so far. I don’t know the exact quantities for most – it’s a bit of a trial and error process but experimenting is fun!
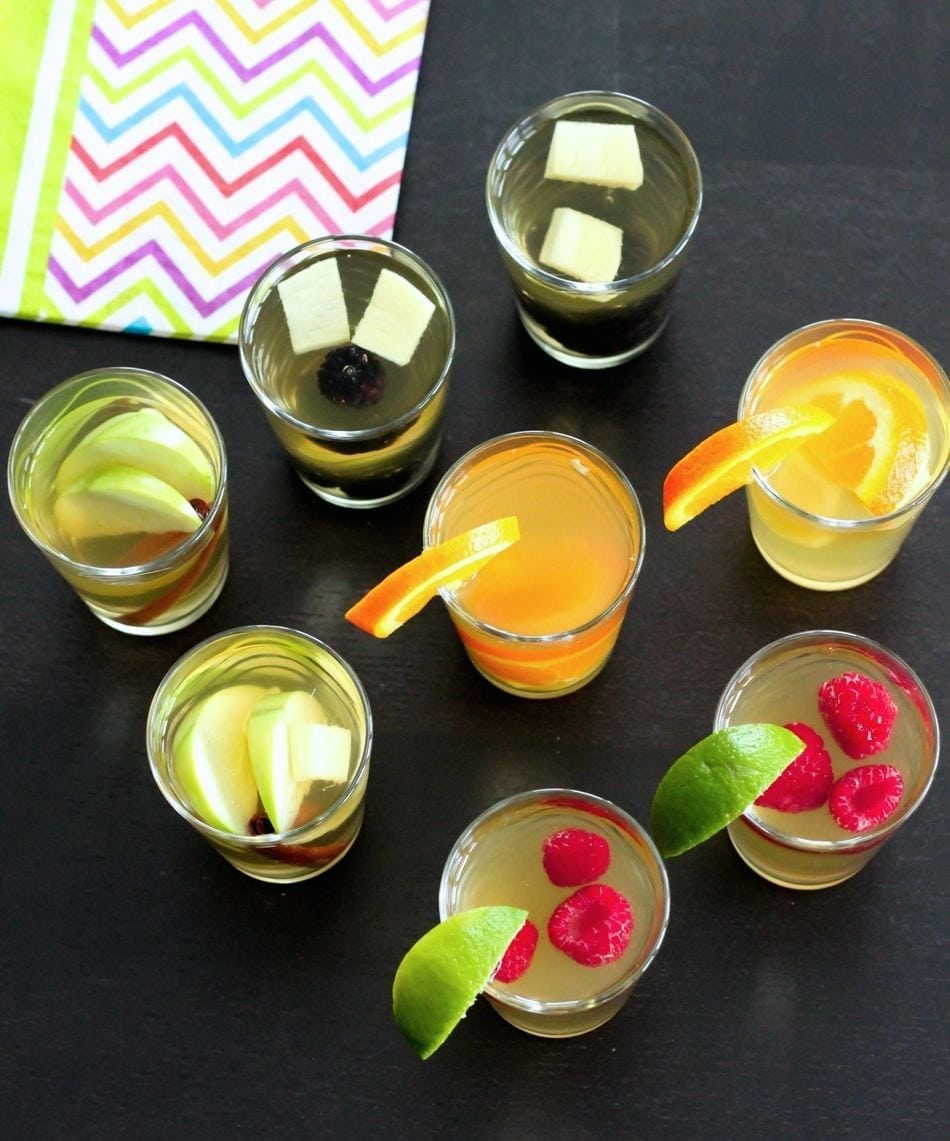
- Ginger Orange: 1 orange squeezed equally between 2 jars + another orange sliced, divided between the jars + 2 inch piece of peeled ginger, sliced. Note: This one is ready right away, whereas the others taste better if you leave the flavourings to sit in them for at least a day before drinking.
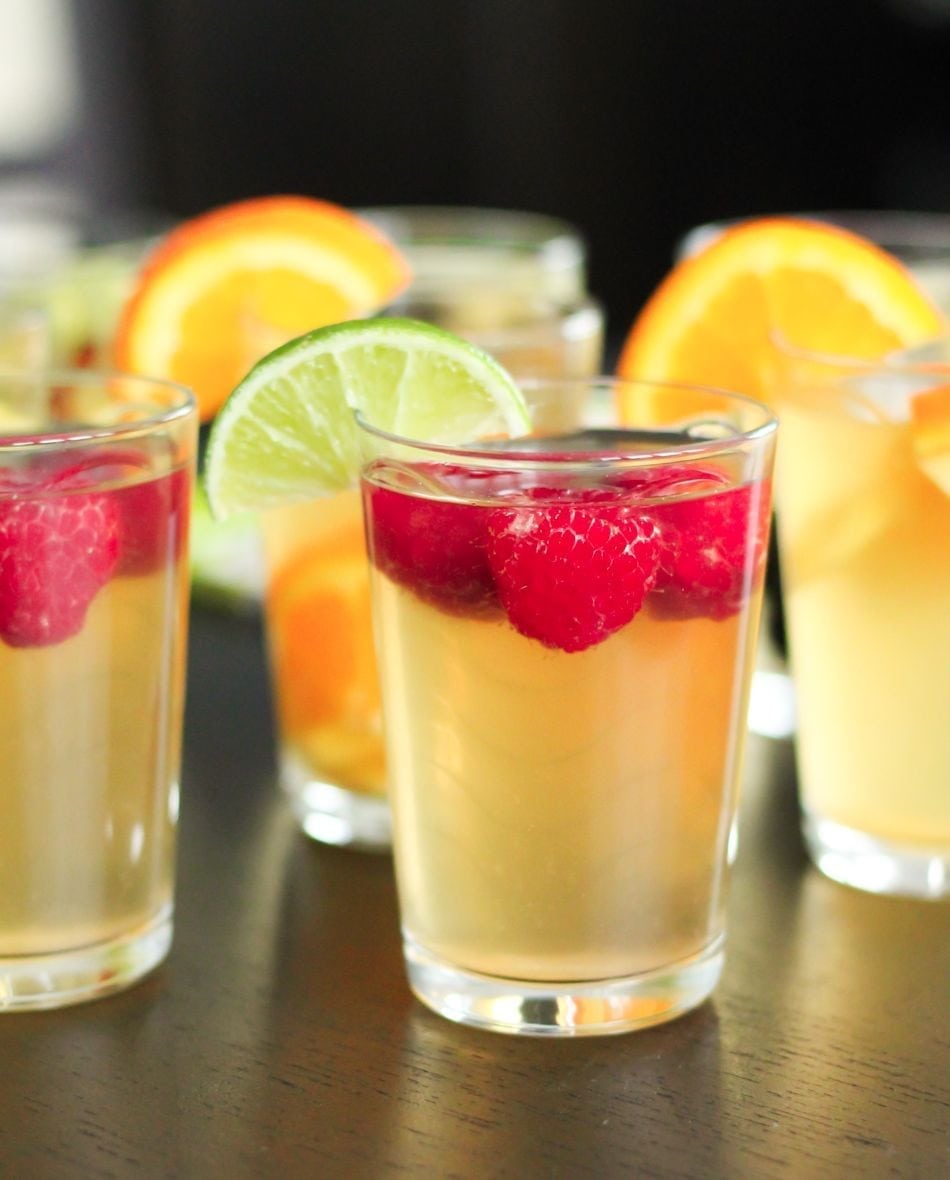
- Raspberry Lime: 1 cup fresh or frozen raspberries (frozen actually seem to create a stronger flavour) + juice of 1 lime, divided equally between 2 jars.
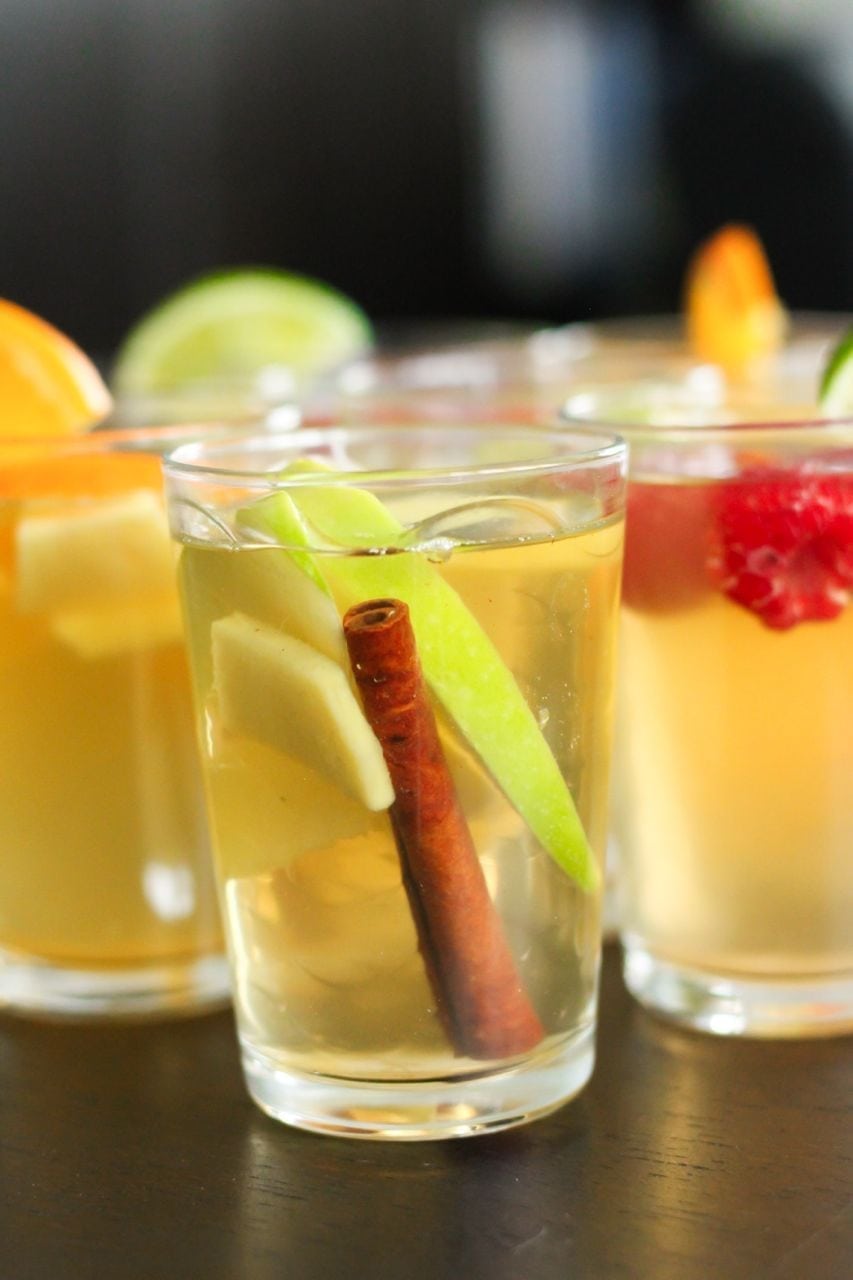
- Spiced Apple Cinnamon: Juice of 1 large Granny Smith apple + 1 sliced Granny Smith apple + 4 cinnamon sticks + 2 inch piece of peeled ginger, sliced
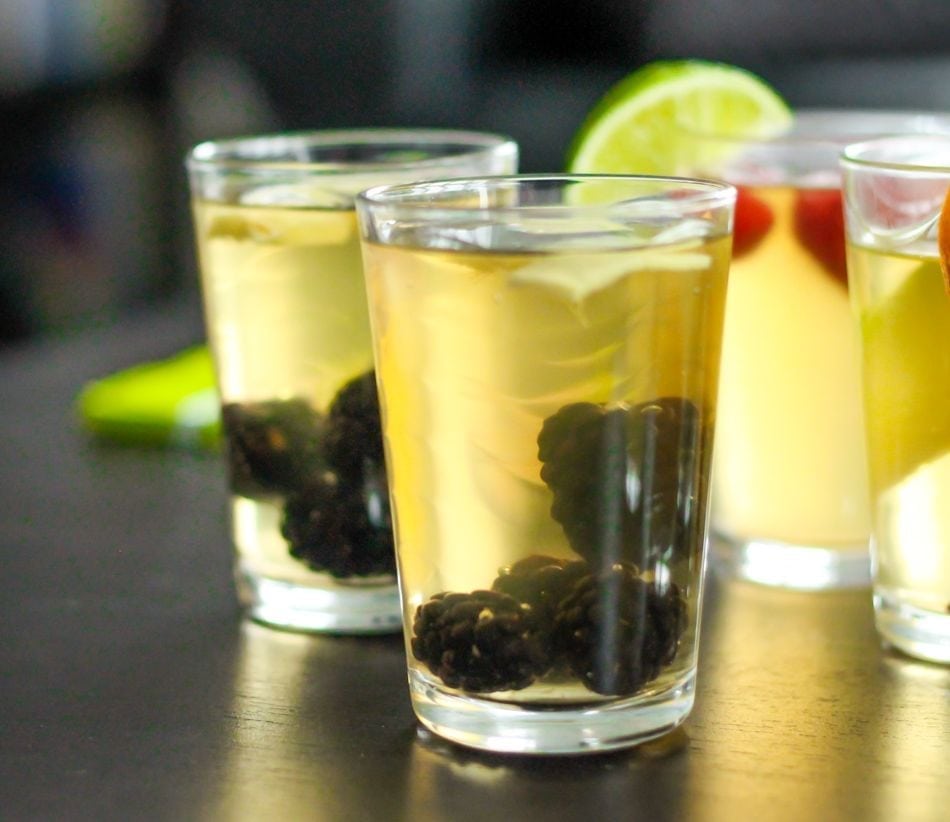
- Blackberry Ginger: 1 cup fresh or frozen blackberries (frozen create a stronger flavour when left for a few days) + 3 inch piece of fresh ginger, divided equally between 2 jars.
[Tweet “Save yourself some $ and make kombucha at home! How-to and recipes via @eatspinrunrpt”]
So tell me…
- Have you ever tried making your own kombucha?
- What are your favourite brands/flavours/homemade versions?
Even though I’ve seen it over and over again at places like Whole Foods I have yet to try Kombucha! I know! I need to get on the train. Great addition to the post by giving so many options to try, I didn’t know there were so many flavors!
Oh my gosh Heidi, you’ve gotta do it! If you like ginger, I recommend starting with a gingerade flavour – GT’s Kombucha, Rise, and Tonica all have a version and they’re my favourites by far when it comes to store-bought versions. I’d love to hear what you think if you give it a go! 🙂
I love kombucha and usually only get it when it goes on sale, and even then it’s expensive. I want to try making my own.
This was the best start to my Monday! I’ve seen/heard so much about people making homemade kombucha that I need to do it myself! That $4 is so hard to swallow!
Yay for homemade kombucha!!! I make my own, and have bottles of it ready all the time. Much cheaper than buying it and so tasty. Plus so much healthy goodness!!
gorgeous gorgeous! i love brewing my own too! it’s so fun. just don’t like waiting. haha
Cheapest roomie alive award! LOL
I can’t wait to try this… How did you evenly divide the vinegar and sugar between your jars?
Just with a measuring cup – 1/4 cup sugar and 1/2 cup vinegar in each. (Sorry, I updated the recipe because I forgot to specify that you need to put those quantities in BOTH jars!)
How do you store a scoby….covered or uncovered….refrigerated or room temp.?
You neef to use it rigjt away to make another batch??
How do you store a scoby. Fo you have to make another batch right away or the scoby will die ? You must have millions of scobys hanging around lol. Do they get better at their jobs the more experienced they are?
Hi Leisa! Great questions. For storage, I usually just reserve some of the kombucha batch and keep the new scoby submerged in that if I’m not brewing another batch immediately. I’ve gone as long as about a month keeping them stored this way without any problems. I’m not 100% solid on the science of it, but I’m pretty sure that as long as the scoby has some sugar to feed on (from that previous batch), it will stay alive. And yes, I’ve noticed that my thicker, slightly older ones do tend to produce more strongly-fermented batches in shorter amounts of time! As for the extras, every batch will produce a mini scoby, so as I brew more, I just toss them together and they kind of start to stick to each other. As for the extras, I’ve given some to friends so that they can start their own mini kombucha factories! 🙂
So Glad I found you. Very nice article. Just started my first kombucha yesterday.
Hooray!!! How has it turned out? Or is it still fermenting?
Why vineagar?